
Jumping your motocross bike is as exhilarating as it is terrifying – and if you want to gain in confidence, you have to know how to jump a motocross bike, how to prepare for the jump, control your body and bike throughout it, and land like an expert (even if you’re a beginner). While jumping on a motocross bike is undoubtedly exciting, it’s also dangerous. If you don’t prepare for, approach and land a jump correctly, you could collide with your bike and/or fly off. You could also neglect to consider what’s on the track after the jump, which could send you off-course or into an obstruction.

Wear the Right Protection
For starters, you want to wear all the right protective gear whenever you’re riding your motocross bike, jump or no jump. But since jumping poses so much risk, being protected is even more vital. You’ll need the following:- Boots
- Chest protection
- Crotch protection
- Helmet with chin guard
- Gloves
- Goggles
- Knee pads
- Neck brace
Step 1: Get to Know the Jump
Analysing the jump and figuring out how you’re going to approach it ahead of time is key to staying relaxed, in control and at a good speed. If you’re unprepared, you’ll be anxious and tense, which could lead to poor, dangerous decisions. You also have to consider what comes after the jump. Is it another jump that you have to immediately get ready for? Is it a curve, a fence, a body of water…? Knowing what’s next will keep you from over-jumping and going head-first into an obstacle or off the track. For the best landing possible, it’s good to choose a jump where you can see the landing ahead of time. This helps with your depth perception and controlling the landing.Step 2: Check the Safe-Landing Zone
When reviewing the jump, you have to also check the safe-landing zone. All of the jumping technique in the world can’t help you if there’s nowhere safe on the other side. You don’t want to jump somewhere with dangerous obstructions to greet you, and if you’re not able to move them out of the way, rethink the jump completely. Look closely, too – a downed tree is obvious, but broken glass isn’t as easy to spot. What’s directly in the landing zone isn’t the only thing you’re checking for. Also make sure that the run-off area is navigable. Hazards that are too close to the landing zone, like a tree or a body of water, are too easy to crash into.Step 3: Approaching the Jump
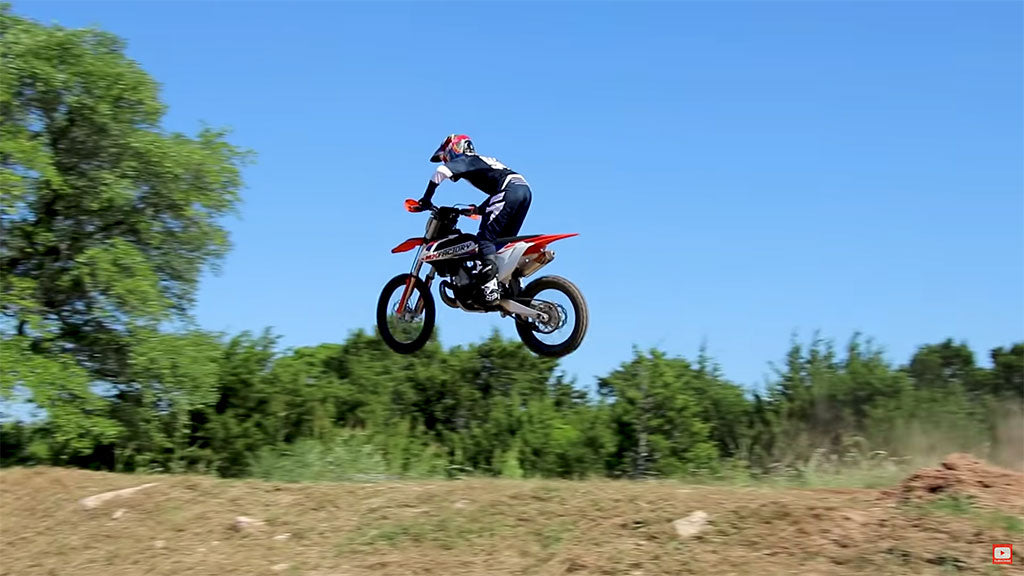
When approaching the jump, your body position is important. You’re going for a neutral position, meaning you’re not too forward or too far back:- Point your feet forward, staying on the balls of the feet rather than the heels.
- Stand up and squeeze your knees in tight.
- Position your hips over the footpegs.
- Lean forward to put your upper body at a 45-degree angle from the ground.
- Keep your elbows in the neutral position.
Step 4: How to Control the Jump
Your throttle delivery plays into how well you control the jump. Stay smooth and steady, and hold the throttle through the base of the jump through the top of your take-off. This will keep the bike straight and on course.

Also, choose the gear you want for the jump ahead of time, and stick with it. Third gear is a good, basic option when you’re learning to jump. What you want to avoid is changing gear as you get close to the jump or when you’re mid-jump.
Step 5: Landing
Squeezing the bike extra tight with your knees helps you to absorb the impact when you make contact with the ground. More advanced riders land with the front of the bike aimed down (which is also a good tactic if you’re landing on a ramp), but for most riders, landing on the rear wheel is best. What’s most important is that, whichever wheel you choose to land on, you’re not too far in that direction. Also, unless there’s a curve right after the landing, it’s best to land on the gas. Even if you’re a bit misaligned during the landing, giving the bike gas will likely straighten you out and keep you in control.

More Tips and Mistakes to Avoid
Leaning Too Far Forward or Back: Putting your body weight too far back could mean falling off the back of the bike as you hit the jump. Putting your body weight too far forward has the same effect, launching you over the handlebars as you land. Squeezing the bike with your knees and maintaining the body position described above will keep you safe.
Standing Up Too Late: By standing up too late as you approach the jump, you won’t have enough time to fully clamp onto the bike, which could launch you off of it as you land. You don’t want to sit during a jump, either, as that could also shoot you off the bike, especially if it’s a steep one.
Not Assessing the Face of the Jump: Look at the face of the jump as you approach it. Too often, riders will look down at the track directly in front of them, then get surprised when they’re on the wrong part of the jump, like in a rut. By that point, you won’t have enough time to correct your mistake. When you’re getting started with jumping your dirt bike, don’t be afraid to be a beginner. Start with small jumps, take it easy on your bike and build from there. Crashes when jumping can be severe, and it’s better to build your skills slowly to avoid wrecking your bike and your body in the process.